How to be a modern entrepreneur in the era of climate changes

Featured

Climate change is real, and it’s here to stay. As a modern entrepreneur, it’s time to take responsibility for our impact on the environment and make some changes. The world needs more eco-preneurs, people who are committed to building sustainable businesses that reduce carbon emissions and promote environmental responsibility.

Let’s now share some tips on how to be a modern entrepreneur in the era of climate changes. We’ll explore eco-friendly business ideas, tips for reducing your carbon footprint, and answer some common questions that eco-preneurs have.

So grab your reusable coffee mug and let’s dive in!

Briefly let’s summarize the base idea:

  1. Start with an eco-friendly business idea
  • Do your research
  • Identify your target market
  • Evaluate your competition
  • Consider the environmental impact of your product or service
  1. Reduce your carbon footprint in the office
  • Go paperless
  • Encourage remote work
  • Use energy-efficient appliances
  • Implement a recycling program
  1. Embrace renewable energy sources
  • Install solar panels
  • Switch to a renewable energy supplier
  • Use smart home technology to reduce energy consumption
  1. Consider sustainable packaging options
  • Use biodegradable materials
  • Minimize packaging waste
  • Encourage customers to recycle
  1. Build a brand that promotes environmental responsibility
  • Be transparent about your environmental impact
  • Partner with eco-friendly organizations
  • Use social media to spread awareness

Yes but how…

Being a modern entrepreneur in the era of climate changes is all about taking responsibility for our impact on the environment. By starting with an eco-friendly business idea, reducing our carbon footprint in the office, embracing renewable energy sources, and considering sustainable packaging options, we can build businesses that promote environmental responsibility and reduce carbon emissions.

It’s not always easy being an eco-preneur, but it’s worth it. So go forth and build businesses that make the world a better place, one step at a time. How to be a modern entrepreneur in the era of climate changes is not just a trend, but it’s a responsibility.

And remember, being an eco-preneur doesn’t mean sacrificing your sense of humor. In fact, a little bit of laughter can go a long way towards making the world a better place. So here are a few more tips on how to be a modern entrepreneur in the era of climate changes, with a dash of humor.

  1. Start with an eco-friendly business idea

When it comes to eco-friendly business ideas, the sky’s the limit. You could create a line of sustainable clothing made from recycled materials, start a zero-waste grocery store, or launch an eco-friendly travel agency. Just make sure that your business idea aligns with your personal values and interests. After all, there’s no point in starting a business that doesn’t make you happy.

  1. Reduce your carbon footprint in the office

As a modern entrepreneur, you probably spend a lot of time in your office. So why not make it a green oasis? You can start by going paperless, which not only saves trees but also saves you money on printing costs. And if you really want to get serious about reducing your carbon footprint, you could invest in a few energy-efficient appliances, like a smart thermostat or a low-energy fridge. Your employees might not be thrilled about drinking lukewarm coffee, but they’ll thank you when they see their reduced energy bills.

  1. Embrace renewable energy sources

Renewable energy sources like solar power and wind turbines are becoming more affordable and accessible than ever before. If you’re looking to reduce your carbon footprint, why not invest in some renewable energy sources for your business? Not only will you be doing your part to combat climate change, but you’ll also be sending a powerful message to your customers and employees about the importance of environmental responsibility.

  1. Consider sustainable packaging options

Packaging waste is a huge problem for businesses of all sizes. But as an eco-preneur, you have the power to change that. You could start by using biodegradable materials for your packaging, like plant-based plastics or compostable paper. And if you really want to make a statement, you could offer a discount to customers who bring their own reusable bags or containers. Not only will you be reducing your carbon footprint, but you’ll also be building a loyal customer base who appreciate your commitment to sustainability.

  1. Build a brand that promotes environmental responsibility

As a modern entrepreneur, your brand is your calling card. And if you want to attract environmentally conscious customers, it’s important to build a brand that promotes environmental responsibility. You could start by being transparent about your environmental impact, and sharing your efforts to reduce your carbon footprint with your customers on social media. And if you really want to make a statement, you could partner with eco-friendly organizations and donate a portion of your profits to environmental causes. Not only will you be doing good, but you’ll also be building a brand that people can feel good about supporting.

So there you have it, a humorous guide on how to be a modern entrepreneur in the era of climate changes. Remember, being an eco-preneur doesn’t mean giving up your sense of humor or your love of business. It just means that you’re committed to making the world a better place, one sustainable business at a time.

FAQs

Q: What are some eco-friendly business ideas?

A: Some eco-friendly business ideas include sustainable fashion, eco-tourism, and green consulting.

Q: How can I reduce my carbon footprint as a small business owner?

A: You can reduce your carbon footprint by going paperless, encouraging remote work, using energy-efficient appliances, and implementing a recycling program.

Q: How can I make my packaging more sustainable?

A: You can use biodegradable materials, minimize packaging waste, and encourage customers to recycle.

Q: What if I already have a business, but it’s not very eco-friendly?

A: Don’t worry, you can always make changes. Start small, like switching to energy-efficient light bulbs or using recycled paper. Every little bit helps.

Q: Will being eco-friendly hurt my bottom line?

A: Actually, being eco-friendly can be good for business. Customers are becoming more environmentally conscious, and they appreciate businesses that share their values. Plus, eco-friendly practices like reducing energy use can save you money in the long run.

Q: Can I be an eco-preneur if I don’t have a lot of money to invest?

A: Absolutely! There are plenty of eco-friendly business ideas that don’t require a lot of money to start. For example, you could start a blog or a YouTube channel focused on eco-friendly living, or launch a line of handmade eco-friendly products.

Conclusion

In conclusion, being a modern entrepreneur in the era of climate changes means embracing sustainability and making eco-friendly choices whenever possible. But that doesn’t mean giving up your sense of humor or your love of business. With a little creativity and a lot of commitment, you can build a business that not only makes money but also makes a positive impact on the world. So go forth, eco-preneurs, and make the world a better place, one business at a time.

Agricultural Startups Can Benefit Surrounding Communities in Developing Countries


Agricultural startups are increasingly being seen as a potential solution to the challenges of food security and poverty in developing countries. These startups often use innovative technologies and approaches to produce food more efficiently and sustainably. However, the impact of agricultural startups on surrounding communities is not well understood.

A recent study examined the impact of an agricultural startup on the surrounding community in a developing country. The startup, which used hydroponics to grow leafy greens, was located in a rural area with high levels of poverty and food insecurity.

The study found that the startup had a positive impact on the surrounding community in a number of ways.

Job creation and economic opportunities

The agricultural startup created jobs and opportunities for local residents. The startup employed 20 people, all of whom were local residents. The startup also provided opportunities for local residents to learn about hydroponics and other agricultural technologies.

This can help to reduce poverty and improve the economic well-being of local residents. Additionally, the startup may also support other businesses in the community, such as restaurants and grocery stores, by providing them with fresh produce.

Access to fresh, healthy food

The agricultural startup provided access to fresh, healthy food for local residents. The startup sold its produce to local restaurants and grocery stores. This made fresh, healthy food more accessible to local residents, who often have limited access to these foods.

Improved access to fresh, healthy food can lead to a number of benefits, including improved nutrition, reduced chronic disease risk, and increased energy levels. This can have a positive impact on the health and well-being of local residents.

Environmental improvement

The agricultural startup helped to improve the local environment. The startup used hydroponics, which is a more efficient and sustainable way to grow food than traditional agriculture. The startup also used water conservation techniques, which helped to reduce water pollution.

Hydroponics uses less water and land than traditional agriculture, and it does not require the use of pesticides or herbicides. This can help to protect the environment and reduce the impact of agriculture on the local ecosystem.

Other potential benefits

In addition to the benefits mentioned above, agricultural startups may also have other potential benefits for surrounding communities. For example, agricultural startups may:

  • Promote gender equality: Agricultural startups may create employment opportunities for women and help to empower women in the community.
  • Support youth development: Agricultural startups may provide training and mentorship opportunities for young people, helping them to develop skills and knowledge that can lead to employment.
  • Strengthen social cohesion: Agricultural startups may bring people together and help to build a stronger sense of community.

Conclusion

Agricultural startups have the potential to play a significant role in addressing the challenges of food security and poverty in developing countries. However, it is important to ensure that these startups are having a positive impact on their surrounding communities.

Policymakers and practitioners can work together to support agricultural startups and to ensure that they are having a positive impact on the communities they serve.

Additional recommendations

In addition to the recommendations mentioned above, policymakers and practitioners may also want to consider the following:

  • Develop policies and programs to support agricultural startups. This could include providing access to capital, land, and other resources, as well as providing training and mentorship opportunities.
  • Work with agricultural startups to develop and implement sustainable practices. This could include using water conservation techniques, reducing the use of pesticides and herbicides, and promoting gender equality and youth development.
  • Monitor the impact of agricultural startups on surrounding communities. This could be done through surveys, interviews, and other data collection methods.

By taking these steps, policymakers and practitioners can help to ensure that agricultural startups are having a positive impact on the communities they serve.

Why it’s Worth Spending Time at Project Startup to Create a Good Development Environment

Starting a new project is always a critical juncture for any development team. It’s the point at which the foundation for the project’s future success is laid. One aspect often overlooked but of paramount importance is the creation of a solid and well-structured development environment. In this article, we’ll explore why it’s worth investing time and effort in implementing a high-quality development environment using technologies like Docker, Docker Compose, Kubernetes (K8s), Continuous Integration (CI), Continuous Deployment (CD), and code versioning. We will also emphasize the value of an easy debugging process.

Setting the Stage for Success

The initial stages of a project are like laying the foundation for a building. A strong foundation ensures stability, scalability, and ease of maintenance in the long run. Similarly, a well-crafted development environment sets the stage for a successful software project. Let’s delve into the reasons why this upfront investment is so valuable, especially when it comes to debugging.

1. Consistency Across Environments

One of the primary benefits of using tools like Docker and Docker Compose is the ability to create consistent development environments across different machines. Developers can work on the same codebase with confidence that their environment matches that of their colleagues. This consistency minimizes the “it works on my machine” problem, making debugging easier and more reliable.

2. Isolation and Dependency Management

Docker containers provide isolation for your application and its dependencies. This means you can encapsulate everything your application needs to run, from libraries to databases, within a container. It eliminates conflicts between different projects and ensures that updates or changes to one component don’t affect others. When debugging, you can isolate specific containers to investigate issues without interfering with the rest of the application.

3. Scalability with Kubernetes (K8s)

As your project grows, so do its infrastructure requirements. Kubernetes offers a robust solution for container orchestration, allowing you to scale your application horizontally and handle increased traffic seamlessly. With K8s, you can also easily deploy debug containers alongside your application to troubleshoot and diagnose issues in a production-like environment.

4. Streamlined CI/CD Pipelines

Continuous Integration (CI) and Continuous Deployment (CD) are crucial for delivering software efficiently and reliably. A well-configured development environment integrates seamlessly with CI/CD pipelines, automating the testing, building, and deployment processes. Debugging becomes easier because you can reproduce issues in a controlled environment and test fixes before deploying them.

5. Code Versioning and Collaboration

Effective version control is essential for collaborative software development. Tools like Git enable teams to track changes, collaborate on code, and resolve conflicts efficiently. When debugging, versioning allows you to trace the history of code changes, making it easier to identify when and how issues were introduced.

6. Reduced Onboarding Time

A well-documented and standardized development environment significantly reduces the time it takes for new team members to get up to speed. Developers can quickly understand the project’s structure and dependencies, making the debugging process more accessible for everyone involved.

7. Enhanced Security and Stability

By defining the development environment using code (Infrastructure as Code), security and stability can be improved. Vulnerabilities can be identified and addressed early in the development process. For debugging, this means you can ensure that security issues are not overlooked and that your debugging environment mirrors your production environment for accurate testing.

8. Easy Debugging (Remote Debugging and Steps)

Creating a good development environment also means enabling easy debugging. With the right setup, you can facilitate remote debugging, allowing developers to pinpoint and resolve issues without the need for complex local configurations. Step debugging tools integrated into your environment make it easier to track the flow of code and identify the root causes of problems.

Conclusion

In conclusion, dedicating time and effort to establish a high-quality development environment at the start of a project is a wise investment. It provides numerous benefits, including consistency, isolation, scalability, streamlined CI/CD, efficient versioning, reduced onboarding time, enhanced security, stability, and future-proofing. Moreover, an emphasis on easy debugging with remote debugging capabilities and step debugging tools ensures that issues can be quickly identified and resolved, further increasing the project’s chances of success. When embarking on a new project, remember that building a strong foundation and debugging infrastructure is key to reaching new heights in software development.

Replace variables into a text file using bash

Hi all,
today I was looking around to see the easiest way to replace variables into a text file with no success so I decided to write a very simple tool to make it possible.

The problem:

We have a text file (xml, txt, csv, etc) and we want to replace some sections using incoming variables.

Example file:

--------template.txt---------
Text to use as template for user:
name: $NAME
code: $CODE
tel: $TEL
...
-----------------------------

Now we want to replace those variables (imagine we are using a very long file with many different variables…)

So let’s build the variable file:

Example variables file:

-------variables.txt---------
NAME="Mario, Rossi"
CODE=523456
TEL=555001890
-----------------------------

Now we want to build the file to obtain:

Resulting FILE:

----------out.txt------------
 Text to use as template for user:
 name: Mario, Rossi
 code: 523456
 tel: 555001890
 ...
 -----------------------------

Now we could use the simple proposed script to do the job.

The script:

----------replace.sh--------------
#!/bin/bash
 if [ $# -ne 3 ]; then
   echo "USAGE:
         ./$0 template.txt destination.txt variables.txt"
   exit 1
 fi
echo "#!/bin/bash
cat > $2 << EOF
`cat $1`
EOF " > $2;
chmod +x $2;
# load variables into env
. $3
# actually replace variables
./$2
-----------------------------

It is intentionally simple (no checks) but works 😉

How to use it:

./replace.sh template.txt out.txt variables.txt

Note:

 This is an extensible way to produce configurable files.
 Undefined variables (into the variable file) will not be replaced.
 Undefined variables (into the template file) will not be used.
 You could also use environment variables into the template.

Enjoy,
Carlo Cancellieri

Copy a VMWare Virtual Machine

Hi,
this post is to show you how to use the copyVm.sh script which can be downloaded here:

https://github.com/ccancellieri/bash-tools/blob/master/copyVm.sh

This script is intended to be an easy way to copy/clone a VMWare Virtual Machine changing in one shot:

  1. The name showed into the VMWare menu
  2. The virtual disk file names
  3. The folder file name

Why

Using VMWare GUI interface in fact you will not be able to change the disk and file name of the VM to clone:

How to use

The script is really simple (and limited) you should use it with careful, following these simple steps:

  • Go into the VMWare server (player) administration interface and stop the VM you want to clone
  • Login on the shell of the machine where the VM is running.
  • Go to the folder where the VM is stored, this is usually:
$ cd /var/lib/vmware/Virtual\ Machines/
  NOTE: This folder contains spaces this is not standard
  • Perform a backup of the VM to clone, place it to a better (without spaces) location 😉
    I use /opt/vm/
$ cp virtualMachine_folder /opt/vm/ -Rpav
  NOTE: The copyVm.sh script will not work properly with folder containing spaces
  • Run the script as following
./copyVm.sh UbuntuFolder32Bit Ubuntu32Bit Cloned_Folder32Bit Cloned_32Bit

Where

  1. UbuntuFolder32Bit is the relative path of the folder where the VM is stored
  2. Ubuntu32Bit is the name of the VM to clone
  3. Cloned_Folder32Bit is the relative path used for the new cloned VM
  4. Cloned_32Bit will be the name of the cloned VM

Example

To get a cloned copy of the ActiveMQ VM (to quickly rise up a VM to use as failover broker) run:

./copyVm.sh ActiveMQ ActiveMQ ActiveMQ_failover ActiveMQ_failover

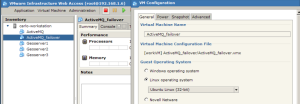
Now import the newly created VM into the VMWare server (or player) and check about its configuration:

ShowRenamedUsingCopyVm

Note: the name of the VM and the configuration file are aligned.

Future plans:

1. Mount virtual disk to change IP and hostname
2. Add checks to make it more simple and safe

Regards,
Carlo Cancellieri

How to configure a cluster of services using Apache httpd:

How to configure a cluster of services using Apache httpd:

This is a small how to to help you to configure a proxy with load balancer to distribute requests between multiple instances of tomcat (slaves), running the same service.

NOTE:
 This is done using the proxy_ajp module.

Stop you httpd daemon:

 /etc/init.d/httpd stop

If you do not want to stop it at the end of this how to configuration run:

/etc/init.d/httpd reload

Backup the default proxy_ajp configuration:

mv  /etc/httpd/conf.d/proxy_ajp.conf  /etc/httpd/conf.d/proxy_ajp.conf.old

Edit a new one:

nano /etc/httpd/conf.d/frontend.conf
--------------------------frontend.conf------------------------
<VirtualHost *:80>
LoadModule proxy_ajp_module modules/mod_proxy_ajp.so
<IfModule mod_proxy_ajp.c>
    ProxyRequests Off
    ProxyTimeout 300
    ProxyPreserveHost On
    ProxyVia On
    <Proxy balancer://cluster>
               BalancerMember ajp://XXX.XXX.XXX.XXX:8008 route=jvm0
               BalancerMember ajp://XXX.XXX.XXX.XXX:8009 route=jvm1
               ProxySet lbmethod=bytraffic
               # ProxySet lbmethod=bybusyness
    </Proxy>
    <Location /balancer-manager>
       SetHandler balancer-manager
       AuthType basic
       AuthName "GeoSolutions"
       AuthUserFile "/etc/httpd/passwd/passwords"
       # Anonymous *
       Require valid-user
    </Location>
    <Location /my_service>
       Order allow,deny
       Allow from all
       ProxyPass balancer://cluster/my_service stickysession=JSESSIONID
    </Location>
 </IfModule>
</VirtualHost>
 --------------------------------------------------------------

Detailed description:

In this configuration we have configured 2 different instances of tomcat using the ajp connector (on ports 8009, 8008).

The Proxy node contains all the BalancerMember of the cluster. Each BalancerMember points to a tomcat instance using the ajp protocol (through its route: see below).

 <Proxy balancer://cluster>
               BalancerMember ajp://XXX.XXX.XXX.XXX:8008 route=jvm0
               BalancerMember ajp://XXX.XXX.XXX.XXX:8009 route=jvm1
               ProxySet lbmethod=bytraffic
               # ProxySet lbmethod=bybusyness
 </Proxy>

The traffic is routed bytraffic but you may chose a different algorithm (see Proxy doc).

Note also that we have configured a route for each slave, all of the above settings should be done into the ${CATALINA_BASE}/conf/server.xml file of each tomcat slave instance:

Set the ajp connector port:

 <!-- Define an AJP 1.3 Connector on port 8009 -->
    <Connector port="8009" protocol="AJP/1.3" redirectPort="8443"/>

Set the route name into the Engine node:

<!-- An Engine represents the entry point (within Catalina) that processes
         every request.  The Engine implementation for Tomcat stand alone
         analyzes the HTTP headers included with the request, and passes them
         on to the appropriate Host (virtual host).
         Documentation at /docs/config/engine.html -->

    <!-- You should set jvmRoute to support load-balancing via AJP ie :
    <Engine name="Catalina" defaultHost="localhost" jvmRoute="jvm1">         
    -->
    <Engine defaultHost="localhost" name="Catalina" jvmRoute="jvm0">

The incoming requests is redirect from the proxy to the load balancer by:

<Location /my_service>
       Order allow,deny
       Allow from all
       ProxyPass balancer://cluster/my_service stickysession=JSESSIONID
 </Location>

Note that we also have attached the stickysession to the proxy pass option, this is needed to be able to use authentication in my_service application, further requests will be redirected to the same slave used to perform login (otherwise you’ll have to perform login to each request or, at least randomly).

The following section is optional and is configured to show you how to configure also a basic authentication on your service. This is useful to check the configuration using your browser:

    <Location /balancer-manager>
       SetHandler balancer-manager
       AuthType basic
       AuthName "My_auth_name"
       AuthUserFile "/etc/httpd/passwd/passwords"
       # Anonymous *
       Require valid-user
    </Location>

Point your browser to http://localhost/balancer-manager to see the manager.

To configure a basic authentication account:

Create a password file:

# mkdir /etc/httpd/passwd
# touch /etc/httpd/passwd/passwords

Create the user:

# htpasswd -c /etc/httpd/passwd/passwords USER
Password: PASSWORD

Start the daemon:

# /etc/init.d/httpd start

or using chkconfig:

# chkconfig --add httpd
# chkconfig httpd on

Now:

  • Each request to http://localhost/ is redirected to one of your tomcat instances depending on the incoming traffic and accordingly to the chosen lbmethod.
  • Session id is preserved thanks to the sticky session option so you will be redirect to the same slave you logged in.
  • You are able to check the status of each Balancer Member using your browser (protected by authentication)

Enjoy!

Carlo Cancellieri

Setup javaplugin for firefox under Ubuntu

Hi,
the following steps can be used to setup javaplugin in firefox under [K|U]buntu.

TESTED ON:  firefox 9.1 on Kbuntu 10 [success]

Check which is your Ubuntu version:

$ cat /etc/lsb-release
DISTRIB_ID=Ubuntu
DISTRIB_RELEASE=10.04
DISTRIB_CODENAME=lucid
DISTRIB_DESCRIPTION="Ubuntu 10.04.3 LTS"

Add new repository (for java sun):

add-apt-repository 'deb http://archive.canonical.com/ lucid partner'

Install required packages:

# apt-get purge openjdk-6-jre openjdk-6-jre-headles
# apt-get update
# apt-get install sun-java6-plugin sun-java6-fonts

Keep updated the java alternative: [optionally]

# update-alternatives --config java

Create alternative for java plugin:

# update-alternatives --install /etc/alternatives/mozilla-javaplugin.so javaplugin /usr/lib/jvm/java-6-sun/jre/lib/amd64/libjavaplugin_jni.so 1

Link new libraries to firefox:

# ln -sf /etc/alternatives/mozilla-javaplugin.so /usr/lib/mozilla/plugins/libjavaplugin.so
# ln -sf /usr/lib/jvm/java-6-sun/jre/lib/amd64/libnpjp2.so /usr/lib/mozilla/plugins/

Restart Firefox and go to:

about:plugins

To check if it works… that’s it!
Regards,
Carlo Cancellieri

References:

http://blog.h2o.ch/archives/25-Java-Flashplayer-unter-Ubuntu-9.04-AMD64.html
http://www.howtoplaza.com/how-to-install-sun-jre-on-ubuntu-10-04

GeoServer on JBoss

Hi all,
currently I’m working @ GeoSolutions on the integration of the GeoServer on an existing JBoss installation.

To be able to easily perform tests I configured all on a 64Bit CentOS 5.7 Virtual Machine on VMWare.

Note also that to use JBoss you need to acquire a license so I used a Jboss 30 days trial which can be freely downloaded from the JBoss site. Looking at this page, you could use the 4.2.1 from the JBoss community site

VM Minimum requirements

  • CPU 2
  • RAM (3Gb – if JBoss is set using 1.5Gb for Heap)

Users

Following users will be configured:

  1. root / PASSWORD
  2. jboss / (no login)
  3. postgres / postgres

Networking

Set a static IP:

# system-config-network

Configure eth0 with static IP:

IP: 192.168.1.XX
NETMASK: 255.255.255.0
GATEWAY: 192.168.1.X

Edit also DNS settings:

DNS1: 192.168.1.X
DNS2: x.x.x.x
DNS3: x.x.x.x

Set firewall using:

# system-config-securitylevel

Not needed for our purposes so disable it.

VMWare tools

Install VMWare tools as following:

# mount /dev/hdc /media/
# tar -xvf /media/VMwareTools-7.7.6-203138.tar.gz -C .
# cd vmware-tools-distrib/
# ./vmware-install.pl

Users

# useradd -r jboss -s /bin/false -m -G adm,users -d /home/jboss

NFS

# yum install nfs-utils portmap

Due to the small size of the VM configured (only 4Gb) I mounted an external share to be able to handle data. To do so, edit the fstab file:

# nano /etc/fstab

Appending:

192.168.1.XX:/media/share/    /media/share        nfs rw,exec,auto,users,rsize=8192,wsize=8192,timeo=14,intr    0 0

Where 192.168.1.XX is the IP of the target NAS and /media/share/ is the shared directory (mounted in the same path locally).

Now create directory, change permissions and mount the share:

# mkdir /media/share
# chgrp users /media/share
# mount /media/share

NTPD

# yum install ntp
# /etc/init.d/ntpd start
# chkconfig ntpd on

JDK6

NOTE:
- It seams that JBoss supports JDK6 since 4.3.0-CP03 https://issues.jboss.org/browse/JBPAPP-1272
- JBPAPP-4172 Attempting to install the IBM JDK 1.5 on 64-bit Red Hat Enterprise Linux 5 results in broken links to Java binaries. This prevents the application server from starting. The workaround for this issue is to use the Sun JDK 1.6 instead.

So we can use the JDK6.
Let’s download it (you need to accept the license):

# wget http://download.oracle.com/otn/java/jdk/6u29-b11/jdk-6u29-linux-x64.bin

Run the binary:

# sh jdk-6u29-linux-x64.bin
# mkdir -p /usr/lib/jvm/

Move into java home:

# mv jdk1.6.0_29 /usr/lib/jvm/jdk1.6.0_29

Update alternatives:

# update-alternatives --install /usr/bin/java java /usr/lib/jvm/jdk1.6.0_29/bin/java 1
# update-alternatives --install /usr/bin/javac javac /usr/lib/jvm/jdk1.6.0_29/bin/javac 1
# update-alternatives --config java
# update-alternatives --config javac

JBoss

Go here https://access.redhat.com/ and download JBEAP-4.3.0.GA_CP09/jboss-eap-4.3.0.GA_CP09.zip

To install simply unzip the file

# unzip jboss-eap-4.3.0.GA_CP09.zip
# mv jboss-eap-4.3 /opt/

Setting jboss user base option and environment [optional]:

# nano /home/jboss/.bash_profile
-----------------APPEND------------------
PATH=$HOME/bin:$PATH
export JAVA_HOME="/usr/lib/jvm/jdk1.6.0_29/"
PATH=$JAVA_HOME/bin:$PATH
export GDAL_HOME="/opt/gdal/"
export GDAL_DATA="$GDAL_HOME/share/gdal"
PATH=$GDAL_HOME/bin/:$PATH
export LD_LIBRARY_PATH="$GDAL_HOME/lib/:$LD_LIBRARY_PATH"
export JBOSS_HOME=/opt/jboss-eap-4.3/jboss-as/
PATH=$JBOSS_HOME/bin:$PATH
export PATH
export GEOSERVER_DATA_DIR="/opt/data/geoserver/"
----------------------------------------------

Change permissions:

# chown -R jboss.jboss /opt/jboss-eap-4.3/

Memory settings can be adjusted by updating JAVA_OPTS settings in the file JBOSS_DIST/jboss-as/server/production/run.conf with these recommended values:

NOTE:
Here we also set the GEOSERVER_DATA_DIR as external:

# nano /opt/jboss-eap-4.3/jboss-as/server/production/run.conf
----------------------------APPEND--------------------
# 16Jan2012 Added in append
#geoserver
export GEOSERVER_DATA_DIR="/opt/data/geoserver/"

#gdal
export GDAL_HOME="/opt/gdal/"
export GDAL_DATA="$GDAL_HOME/share/gdal"
#logging
JBOSS_LOG_DIR=/opt/jboss-eap-4.3/jboss-as/server/default/logs/

JAVA_OPTS="$JAVA_OPTS -XX:PermSize=256m -XX:MaxPermSize=256m -XX:+UseConcMarkSweepGC-XX:NewSize=48m -DGEOSERVER_DATA_DIR=$GEOSERVER_DATA_DIR -Djboss.server.log.dir=$JBOSS_LOG_DIR”
-----------------------------------------------------------

Edit jboss_init_redhat.sh in the bin directory so that the variables match the installation.

 # nano /opt/jboss-eap-4.3/jboss-as/bin/jboss_init_redhat.sh

The script jboss_init_redhat.sh in the bin directory is the script used to launch the server as a service. Append the following lines to the beginning of this script so that the first four lines below the initial comments look like those below.

------------------------------------------------------------------------
 #!/bin/sh
 #chkconfig: 2345 85 15
 #description: JBoss Enterprise Application Platform
 #processname: jboss
------------------------------------------------------------------------

These lines are needed by the chkconfig command.
Note that the chkconfig option specifies the runlevel, start priority, and stop priority. 2345 specifies the server will start only in runlevels 2, 3, 4, and 5.

Change also:

 ----------------------------------------------------------
 if [ "$JBOSS_USER" = "RUNASIS" ]; then
 SUBIT=""
 else
 SUBIT="su - $JBOSS_USER -c "
 fi
 ----------------------------------------------------------

Appending ‘-s /bin/sh’ to command:

 ----------------------------------------------------------
 if [ "$JBOSS_USER" = "RUNASIS" ]; then
 SUBIT=""
 else
 ## CHANGED on 16Jan2012
 #  SUBIT="su - $JBOSS_USER -c "
 SUBIT="su - $JBOSS_USER -s /bin/sh -c "
 fi
 ----------------------------------------------------------

JBOSS_HOME
This is the path of the JBoss Enterprise Application Platform’s jboss-as directory. This value must be set here.

------------------------------------------------------------------------
JBOSS_HOME=${JBOSS_HOME:-"/opt/jboss-eap-4.3/jboss-as/"}
------------------------------------------------------------------------

JBOSS_USER
This is the user created previously for running the JBoss Enterprise Application Platform.  The example sets it to the user name of jboss:

------------------------------------------------------------------------
JBOSS_USER=${JBOSS_USER:-"jboss"}
------------------------------------------------------------------------

JBOSS_CONF
This is the name of the server configuration that the server will be using.
The example sets it to default. The profiles available to use are contained in the /jboss-as/server/ directory.

 ------------------------------------------------------------------------
 JBOSS_CONF=${JBOSS_CONF:-"production"}
 ------------------------------------------------------------------------

JAVAPTH

------------------------------------------------------------------------
JAVAPTH=${JAVAPTH:-"/usr/lib/jvm/jdk1.6.0_29/bin"}
------------------------------------------------------------------------

JBOSS_HOST
JBOSS_HOST must be specified when binding the JBoss Enterprise Application Platform server to a specific IP address. This must be done before JBOSS_HOST is used by JBOSS_BIND_ADDR.

This must be configured to make the server available on the network. The default configuration binds the server to the IP address of 127.0.0.1.

------------------------------------------------------------------------
#if JBOSS_HOST specified, use -b to bind jboss services to that address
JBOSS_HOST=192.168.1.X
JBOSS_BIND_ADDR=${JBOSS_HOST:+"-b $JBOSS_HOST"}
------------------------------------------------------------------------

Link script into init.d:

Create a symbolic link to jboss_init_redhat.sh in the directory /etc/init.d/. The name of the target of the symbolic link is the name of the new service.

 # ln -s /opt/jboss-eap-4.3/jboss-as/bin/jboss_init_redhat.sh /etc/init.d/jboss_eap

Activate Service
Use the command chkconfig with the –add parameter to add the new service to the system configuration.

 #chkconfig --add jboss_eap

Configure Startup and Shutdown Behavior
Use the command chkconfig with the on parameter to start the service at boot time, and stop it gracefully when the server hosting the application server is shut down or restarted.

 #chkconfig jboss_eap on

Enable JMX console:

Be sure to enable JMX section: (<application-policy name = “jmx-console”>)

#nano /opt/jboss-eap-4.3/jboss-as/server/production/conf/login-config.xml

Edit the file:

#nano /opt/jboss-eap-4.3/jboss-as/server/production/conf/props/jmx-console-users.properties

And set USERNAME and PASSWORD:

USERNAME=PASSWORD

Geoserver

The used GeoServer is a nightly build in version: 2.1.x (SNAPHOT)

# wget http://gridlock.opengeo.org/geoserver/2.1.x/geoserver-2.1.x-latest-war.zip
# unzip /root/geoserver-2.1.x-latest-war.zip
# unzip geoserver.war -d /opt/jboss-eap-4.3/jboss-as/server/production/deploy/geoserver.war
# chown jboss.jboss /opt/jboss-eap-4.3/jboss-as/server/production/deploy/geoserver.war
# mkdir /opt/data/geoserver
# chown jboss.jboss /opt/data/geoserver

Remove GeoWebCache [Optional]:

# rm `find /opt/jboss-eap-4.3/jboss-as/server/production/deploy/geoserver.war/WEB-INF/lib/ -name *gwc*` -f
# /etc/init.d/jboss_eap restart

ClassLoader isolation [Optional]:

GeoServer do not require (for this version of JBoss class loader isolation) anyway it should be done as following:

# nano /opt/jboss-eap-4.3/jboss-as/server/production/deploy/geoserver.war/WEB-INF/jboss-classloading.xml
--------------------------------------------------------------------
<classloading xmlns="urn:jboss:classloading:1.0"
        name="geoserver.war"
        parent-first="false"   
        domain="GeoServerDomain"
        top-level-classloader="true"
        parent-domain="Ignored"
        export-all="NON_EMPTY"
        import-all="true">
</classloading>
--------------------------------------------------------------------

For JBoss 5 and above, remember to remove following libs: (As specified in the GeoSolutions blog post)

stax-api-1.0.1.jar
xercesImpl-2.4.0.jar
xml-apis-1.0.b2.jar
xml-apis-xerces-2.7.1.jar
xpp3-1.1.3.4.O.jar

PostgreSQL Ver 9.1

To install PostgreSQL server 9 we need to add some deps:

# wget http://yum.pgrpms.org/9.1/redhat/rhel-5-x86_64/pgdg-centos91-9.1-4.noarch.rpm
 # rpm -i pgdg-centos91-9.1-4.noarch.rpm
 # yum install postgresql91-contrib.x86_64 postgis91.x86_64 postgresql91-server postgresql91-contrib.x86_64 proj geos php-pear php-devel

PL/pgSQL

You you are ready to initialize the database files and start postgresql.

 $ service postgresql-9.1 initdb
 $ service postgresql-9.1 start

Now you can change to the postgres user and begin installing the functions for GIS. You have to start with defining the language.

$ su - postgres
$ psql
# create language plpgsql;
# ALTER USER postgres with encrypted password 'postgres';
# q

Now you can create your database and add the GIS functions calls to it.

 $ createdb geos
 $ psql -d geos -f /usr/pgsql-9.1/share/contrib/postgis-1.5/postgis.sql
 $ psql -d geos -f /usr/pgsql-9.1/share/contrib/postgis-1.5/spatial_ref_sys.sql

Edit the file:

$ nano /var/lib/pgsql/9.1/data/pg_hba.conf

set ‘local’ and ‘host’ as follow:

 ------------------------------------------------------------
 local   all             all                                     md5
 # IPv4 local connections:
 host    all             all             192.168.1.0/24            md5
 ------------------------------------------------------------

Remember to restart the PostgreSQL service:

$ exit
# /etc/init.d/postgresql-9.1 restart

NOTE:
This is a really general purpose (and not really safe) set-up, please ref to PostgreSQL documentation to understand how to refine modified params.

Edit also this file:

$ nano /var/lib/pgsql/9.1/data/postgresql.conf

as following:

-------------------------------------------------------------------------------
#------------------------------------------------------------------------------
# CONNECTIONS AND AUTHENTICATION
#------------------------------------------------------------------------------
# - Connection Settings -
#listen_addresses = 'localhost'         # what IP address(es) to listen on;
listen_addresses = '*'
                                       # comma-separated list of addresses;
                                       # defaults to 'localhost', '*' = all
                                       # (change requires restart)
port = 5432                             # (change requires restart)
max_connections = 100                   # (change requires restart)
-------------------------------------------------------------------------------

NOTE:
This is a really general purpose set-up, please ref to PostgreSQL documentation to understand how to refine modified params.

Setup Postgresql JDBC datasource:

Now you can configure a JBoss datasource to connect to the configured database using a connection pool:

# mv /opt/jboss-eap-4.3/jboss-as/server/production/deploy/geoserver.war/WEB-INF/lib/postgresql-8.4-701.jdbc3.jar /opt/jboss-eap-4.3/jboss-as/server/production/lib/
# cp /opt/jboss-eap-4.3/jboss-as/docs/examples/jca/postgres-ds.xml /opt/jboss-eap-4.3/jboss-as/server/production/deploy/

Edit the file setting username, password, database, url and port of the running PostgreSQL server:

# nano /opt/jboss-eap-4.3/jboss-as/server/production/deploy/postgres-ds.xml
NOTE:
 You may also want to set the queries to check the connection.

Setup Oracle JDBC datasource:

# cp ojdbc14.jar /opt/jboss-eap-4.3/jboss-as/server/production/lib/
# cp /opt/jboss-eap-4.3/jboss-as/docs/examples/jca/oracle-ds.xml /opt/jboss-eap-4.3/jboss-as/server/production/deploy/oracle-ds.xml

Change connection parameters setting username, pass, url, sid and port::

# nano /opt/jboss-eap-4.3/jboss-as/server/production/deploy/oracle-ds.xml

Edit the file:

# nano /opt/jboss-eap-4.3/jboss-as/server/production/conf/jboss-service.xml

Search for:

<!-- The configurable Xid factory.  For use with Oracle, set pad to true -->
   <mbean code="org.jboss.tm.XidFactory"
      name="jboss:service=XidFactory">
<!-- <attribute name="Pad">true</attribute> -->
   </mbean>

And uncomment the ‘Pad’ attribute as follow:

<!-- The configurable Xid factory.  For use with Oracle, set pad to true -->
   <mbean code="org.jboss.tm.XidFactory"
      name="jboss:service=XidFactory">
      <attribute name="Pad">true</attribute>
   </mbean>

Is assumed that you’ve created a user with all the sufficient privileges.

SQL> connect / as BATABASE
Connected.
SQL> create user jboss identified by password;
User created.
SQL> grant DATABASE to jboss;
Grant succeeded.

Copy the file to the deploy directory. You should get the following output.

11:33:45,174 INFO  [WrapperDataSourceService] Bound connection factory for resource adapter
for ConnectionManager 'jboss.jca:name=OracleDS,service=DataSourceBinding to JNDI name
'java:OracleDS'

If you use the JNDIView service from the JMX console as before, you should see the name java:/OracleDS listed.

That’s it!

If you need more info or if you want to install native libraries and extensions for the configured GeoServer, please contact me 😉

References:

GeoSolutions

http://www.geo-solutions.it

JBoss Installation guide

http://docs.redhat.com/docs/en-US/JBoss_Enterprise_Application_Platform/4.3/html/Installation_Guide/Getting_Started.html

Intallation specifications

http://docs.redhat.com/docs/en-US/JBoss_Enterprise_Application_Platform/4.3/html-single/Release_Notes_CP09/index.html

Compatibility and tested configurations

http://www.jboss.com/products/platforms/application/supportedconfigurations/#JEAP4.3

Import a Spring project into eclipse using maven

Aside

Hi,  here is a little How-To which i use to remind which are the needed (and very well tested) options to use in my maven projects 😉

The Eclipse plug-in specs can be found HERE

To include the plug-in into a maven project all you need to do is to add the following plugin node:

<plugins>
 ...
 <!-- eclipse ide integration -->
 <plugin>
  <artifactId>maven-eclipse-plugin</artifactId>
  <version>2.5</version>
 </plugin>
 ...
</plugins>

To use the plugin run:

mvn eclipse:clean eclipse:eclipse

To get the version into the project name use:

-Declipse.addVersionToProjectName=true

When you specify the above maven eclipse plugin option the eclipse project name will use the version specified into the pom file (${project.version}).

NOTE:
Sometime you may encounter a project build path problem. To solve, read below.

By default the org.eclipse.jdt.core.javanature nature plus the needed WTP natures are added.
Natures added using this property replace the default list.

<projectnatures>
   <projectnature>org.eclipse.jdt.core.javanature</projectnature>
   <projectnature>org.eclipse.wst.common.modulecore.ModuleCoreNature</projectnature>
</projectnatures>

List of eclipse project natures to be added to the default ones:

<additionalProjectnatures>
   <projectnature>org.springframework.ide.eclipse.core.springnature</projectnature>
</additionalProjectnatures>

This is the result:

<plugins>
 ...
 <!-- eclipse ide integration -->
 <plugin>
  <artifactId>maven-eclipse-plugin</artifactId>
  <version>2.5</version>
  <configuration>
   <additionalProjectnatures>
    <projectnature>org.springframework.ide.eclipse.core.springnature</projectnature>
   </additionalProjectnatures>
  </configuration>
 </plugin>
 ...
</plugins>

Now we could build the project. I usually use the following command which also imports javadocs and sources to make development more comfortable:

mvn eclipse:clean eclipse:eclipse -DdownloadSources=true  -DdownloadJavadocs=true -Declipse.addVersionToProjectName=true

Have fun with Spring and maven 😉

How to easily change the version in a complex maven project

In this post I’d like share the work I performed in GeoSolutions to change the version in a complex maven project (GeoBatch for instance).

If you are working on huge and modular maven project you may need to recursively update the version of the project in all of the pom.xml files.
This can be done using a very simple bash script, (patch are really appreciate) which can downloaded here.

Notes

Dependencies

  1. xmlstarlet
  2. bash

Usage

USAGE: src/bash/changeVersion {-n|-b|-c} <BASE_DIR> <NEW_VERSION>
-n dry run
-b run (perform backup)
-c run (no backup)
RETURN:
0 if success
1 if fails

Example

To update the project located in /works/MY_PROJECT from the previous version to the new version (for example 1.1-SNAPSHOT) do:

$./changeVersion -n /works/MY_PROJECT/ 1.1-SNAPSHOT

This will print all the found pom.xml file recursively after the update. Note that -n options mean that changes are not actually applied to the project.

To do so use -b or -c (use it with carefully)

Enjoy,

Carlo Cancellieri